

Take one look at some infrared (IR) photography, and I dare you not to want to try your hand at it. Some of the photographs taken with IR cameras are jaw-dropping.
They transport you to a land that is at once familiar, absolutely bizarre, and highly detailed.
I got to wondering, how to take infrared photography using M43? To use a micro four-thirds camera to take infrared photography, you need to use IR filters or convert the camera to IR.
The surreal quality of photos taken with an IR camera cannot be replicated.
Luckily, there are a few different options for using an M43 camera to create these images. Continue reading to discover which option will work best for you.
Why Use a Micro Four Thirds Camera to Take Infrared Photos?
M43 cameras are mirrorless, compact, lightweight, and versatile, and they are a favorite among photographers for these reasons. They are also the ideal camera to use for infrared photography, and here’s why.
M43 cameras make focusing infrared images easy because, unlike other cameras, they can autofocus infrared light.
Other cameras will require a professional conversion to IR for the autofocus to work accurately, or you will have to adjust the focus frequently.
Additionally, you get a real-time preview of the image on the rear screen because autofocusing happens via the imaging sensor. Most cameras cannot do this.
If you use a filter with a DSLR, you must put the camera up on a tripod and set up the image before putting on the infrared filter, and cross your fingers that you don’t move the camera in the process.
All M43 cameras have an electronic viewfinder. The electronic viewfinder will show you a detailed preview of the infrared image.
This comes in handy on bright days, the best kind of day for capturing infrared images when the screen can be difficult to see.
Methods of Taking Infrared Photos
There is no way to take an infrared photo just by altering the settings of your M43 camera. To take IR photos, you will either need to convert the camera to IR or purchase an external filter to put over the lens.
External Infrared Filters
Using external filters is an easy way to experiment with infrared photography without considerable investment.
Infrared filters only allow infrared light to pass through the lens and block the visible light.
The most commonly used IR filter is a 720nm like the Hoya R72, which costs around $39.90. This filter still allows a small amount of visible light to pass, which will give a hint of color that can be altered in processing.
As you reach 850nm, the filter will block out more visible light, and you will begin to reach true infrared. The exposure time will increase, as well.
As you dip into the 600nms, more visible light will be allowed to pass through the filter. The more visible light allowed to pass through the filter, the more color that image will have.
Many photographers like this because it allows for some interesting processing options.
The trouble with IR filters is that they require long exposure times.
Almost every camera has an internal filter that blocks out infrared light, and since infrared light is all the external filter allows to pass through it, the camera has a hard time getting enough light to make the picture.
More simply put, your filter will block visible light while your camera will block IR light, drastically reducing the amount of light the camera can use to create an image.
When using an infrared filter, the exposure time is usually between 30 seconds to 120 seconds, and you will need a tripod. No spontaneous shots with this method!
Converting the Camera to IR
The limitations of using IR filters are why many decide to convert one of their cameras to IR. A converted camera will act just as it usually does; only it will take IR photos instead of photos using only visible light.
To convert a camera to IR, you will need to swap the IR cut filter inside the camera with an IR pass filter. With this conversion, your camera will only capture IR images.
You can do this conversion on your own if you feel comfortable working with small electronics and following online tutorials.
However, most people opt to have the camera professionally converted by companies like LifePixel to avoid ruining an expensive piece of equipment.
You should know that converting a camera will void its warranty.
The benefit of this method is that you will no longer experience those long exposure times.
You can take pictures without a tripod and spontaneously. This is because the camera will no longer have a filter that blocks infrared light.
The disadvantage of implementing this method is that you will no longer use the camera to take normal pictures.
Converting the Camera to Full Spectrum and Use with Filters
Converting your camera to full-spectrum works the same way as converting it to IR. The IR cut filter must be removed from the camera and replaced with a clear filter. The clear filter will not block any wavelength of light.
You will then need to use an external IR filter to capture an IR photo of an IR blocking filter to take a standard photograph.
Since the filter that blocks infrared light was removed from the camera, you no longer need to worry about the long exposure times.
This is ideal because you can carry one compact camera and a handful of filters and still have a range of options at your fingertips, no tripod required.
There is no disadvantage to this setup other than cost. The cost for the conversion service is $275, the same as the cost to convert to IR, but you will need to add in the cost of the external filters with this method.
Tips for Taking Infrared Photos using an M43 Camera
Get Enough Light
While other types of photography might avoid the midday sunshine, IR photography flourishes in it. The more abundant the sunlight, the better it is when it comes to IR photography.
Hot Spots
Hot spots are a plague to IR photographs. They happen because lenses are designed to be used with visible light. IR is not popular enough for lens makers to consider the need to avoid IR hotspots.
Specific lenses work better than others with IR photography. Kolari Vision keeps a list of good performers and poor performers here.
White Balance
When taking IR photos, you will quickly notice that they are all very red. This doesn’t bother everyone because the image can be adjusted when it is processed later, but some find it very distracting.
You can change this by changing the white balance in your camera settings. Set your white balance with the color of the grass, and the redness will disappear.
Alternatively, playing with the white balance can result in some false color weirdness that can be very appealing.
RAW
If you don’t already, make sure you have your camera set to capture the RAW images so that you can process them more effectively later.
Contrast
The trick to making stunning IR images is to play with the contrast of the objects in the photo.
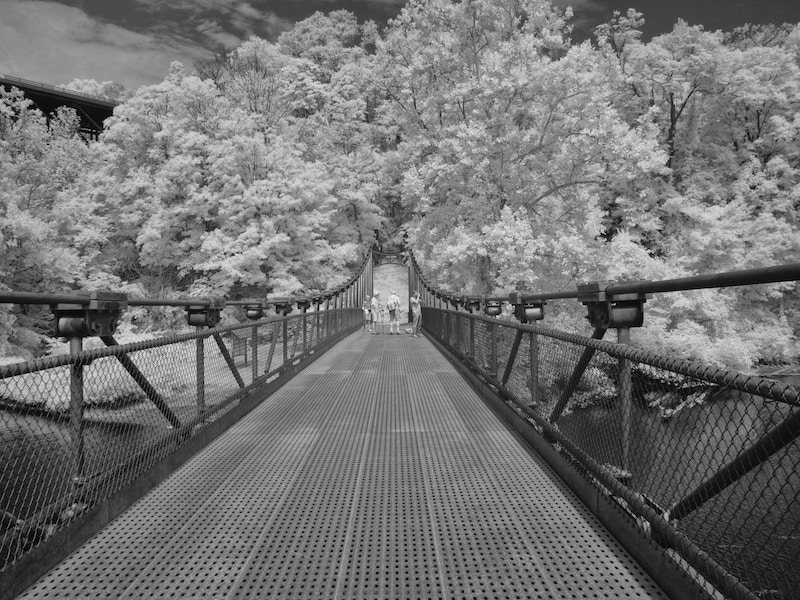
Generally speaking, living things reflect IR light and will show up white in an IR photo, while non-living things absorb it and show up darker.
This is why landscapes are often captured using IR photography. The sky, mountains, and water absorb infrared light and dark in the photo. In contrast, the trees and grass reflect the IR light and show up white.
This is not always the case. The best way to find out is to go out and explore how different materials react to IR light.
Use Your Already Developed Skills
If you are using a dedicated infrared camera, your skills in traditional photography will transfer over in terms of exposure and composition.
However, different models of cameras will all handle IR in their particular way.
For example, some models might need more compensation with exposure. Do a lot of experimenting while getting familiar with how your gear handles the conditions when working in IR.
Keep an Eye on the LCD
Your eyes can’t see in the infrared spectrum, so it can be tough to spot any issues with a scene. You can counteract this handicap by using your LCD screen to highlight problems such as light flares.
Infrared Post Processing
The dull pinkish hues of your RAW images will need work before they are transformed into captivating IR images
Select image> Adjustments > Channel Mixer and swap the colors. Select the blue channel and crank the red up to 100% in the drop-down box. Reduce all the other values to zero.
Do the same for the red channel, but this time,
It would be best to view a high-contrast color image, but don’t be afraid to experiment and have some fun with the color ratios.
Try the auto-tone to see what happens. Take note of what’s happening in the blue and red channels. Adjusting the red will make the sky and the foliage pop.
You will find many unexpected hues in your IR image if you spend some time tinkering with the settings. Make sure you experiment a lot before you finalize the image.
For instance, white foliage will present a fascinating, almost alien contrast against a dark sky.
You can increase the white levels of your foliage by selecting those hues and then dragging the saturation right down.
In Conclusion
Infrared photography isn’t a hugely popular medium, but that doesn’t make it less fascinating.
It’s an invisible world hidden just outside of our periphery, and an IR camera allows you to cast aside the veil and explore the untapped potential in a new and captivating medium.
IR filters allow you to dip your toes without spending a lot of money. Still, an investment in a dedicated IR camera or a conversion will enable you to maximize your IR photography for the real magic to happen.