

Spiders are everywhere; you have to know where to look for them. For photographers, they are fantastic subjects to photograph, especially with a micro four-thirds camera .
.
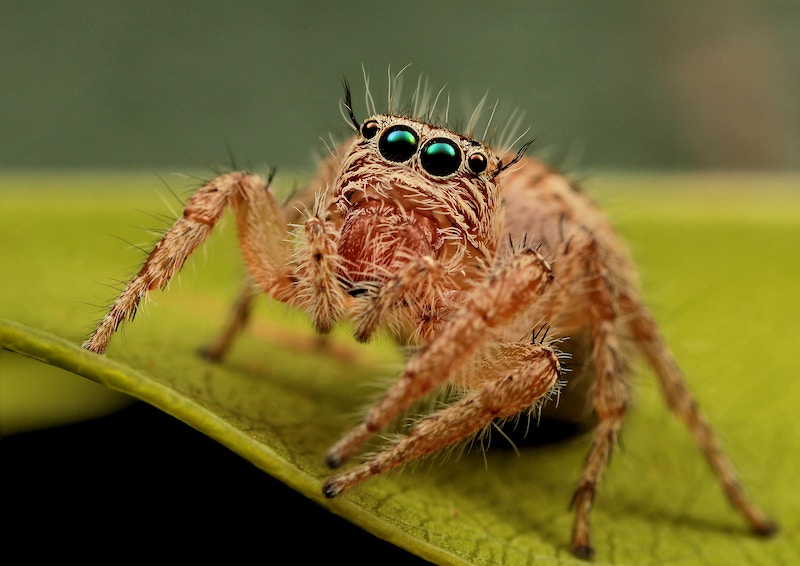
Their small shapes and multiple round eyes lend themselves to out of this world photos.
All you need to photograph them is a great macro lens, a four-thirds camera, and some patience for you to be well on your way to taking awesome macro shots of spiders.
In this article, we will share some hints and tips you can use to capture the eight-legged tricky subject with your m43 camera.
Do Your Research
Research is critical when photographing spiders. For instance, you may live in an area where venomous spiders live, so it’s a good idea to know which ones they are before venturing outdoors!
Familiarise yourself with local species and find out where they might live by reading up on their behavior online.
It’s best to venture out in the early mornings just before the sun shows itself. At this early time, spiders are at the least active. Having spent the night hunting and constructing webs, it’s now their rest time.
You should search for spider webs in tree branches which are relatively low to the ground, under benches or between fences. It’s in these places you are most likely to see spiders.
Once you have located a spider, you either can photograph it in its natural surroundings or gently relocate the arachnoid to another shooting location close. Just remember to return the spider to where you found it afterward.
Photography Tips For Taking Awesome Spider Macro Images
Get Close to the Spider
When you have your gear all set up move in close to your subject. Set your focus to the minimum and then step back and forth until you find the focal plane where the spider reaches focus.
You may find you have to decrease your aperture to allow a larger depth of field to get more of the spider in focus.
Get to the Same Level as the Spider
If the spider you are taking a photo of is on the ground, you should also be on the ground. The idea here is to create as much space behind the spider so you can increase your depth of field.
Ideally, you want the background as blurry as possible, so the spider appears to almost jump from the photo.
Bring a Spray Bottle
You might be asking why, but if you carry a spray bottle with some water, you can create a fantastic effect. Once you find the spider lightly spray some water above where it resides.
The spray will form small water droplets on the spider’s hairs, so when you capture a photo, you end up with a fantastic result.
Take Along Some Coloured Card and Clamp
To take excellent spider macro photography, you have to think outside the square. To elevate your photography skills, try putting a piece of colored card behind the spider when photographing it using a macro lens.
What you will see is a striking image, primarily if you use bold colors such as orange, red, blue, or green.
Try Focus Stacking
Have you see ultra-sharp images of spiders before and wondered how the photographer was able to achieve all the subject in focus? Well, here’s the answer – focus stacking.
Focus stacking is the technique of capturing multiple images at different focus steps and combine them all in post-processing to create an incredibly sharp photo.
Photoshop is one of the programs people use to merge photos. It’s worth noting if you are going to try focus stacking you should use a tripod otherwise your end photo will contain misalignments.
Select The Right Gear
The Best 4/3 Gear for Photographing Spiders
There are many cameras in the marketplace, and comparing models can quickly become confusing.
Rather than give up and become frustrated when looking for a camera you have to ask yourself the question, what are you going to use the gear for?
Many people might say to capture images of my holiday while I’m on vacation. Here’s where you might be different.
You’re reading this article because you are most likely interested in spiders and the smaller things of this world. So for you, selecting a camera for macro spider photography would be necessary right?
Well, to answer your question, the best camera set up to take awesome spider macro photography images is an m43 model.
Olympus and Panasonic are the leading brands of micro four thirds, and for many photographers choosing a brand comes down to the lens choice. For macro photography, there’s no better brand than Olympus.
The reason why is due to their class-leading M.Zuiko 60mm f/2.8 Macro Lens. We will explain more about the lens later, but for now, let’s examine an Olympus 4/3 camera body.
Five-Axis Image Stabilization
All micro four-thirds Olympus bodies, like the OMD or PEN series, contain a five-axis image stabilizer.
This feature is industry-leading and means in low light situations you don’t have to rely on a tripod as the camera’s stabilizer will keep your shot steady.
In technical terms, this means you can comfortably hold your m43 camera at around 1/20th of a second without any blur.
For macro spider photography, this means in most cases; you don’t need a flash so you can obtain images in natural light.
The Best Lens for Spider Macro Photography – M.Zuiko 60mm f/2.8 Macro Lens
One other essential piece of equipment you will require is a macro lens.
Olympus’s 60mm is perfect for photographing spiders up close. With a 1:1 lifesize magnification, this lens will almost fill the frame with a small spider.
Best of all, the lens autofocuses with accuracy so all your images will be sharp with no blur.
The Best Lighting Setup for Spider Macro Photography
When photographing spiders close up, you may experience a lack of available light. A macro lenses light-gathering ability at wide apertures is less crucial because it can be reasonably far from the subject.
Therefore, you should use a macro flash system to solve this problem. Olympus manufacturer multiple units and sets as described below:
- MAL-1 Macro Arm Light (best for entry-level)
What mistakenly looks like a probe, the portable LED lighting setup from Olympus offers flexibility and power in one unit.
When mounted to your camera the dual MAL-1 Macro Arms can move seamlessly into position with ease. Power is generated via an accessory port on the camera, so continuous light remains constant.
What’s brilliant about the design is each 17cm arm moves independently to light spiders from any direction. This simple setup reduces shadows or creatively adds shadow to reimage the subject in a three-dimensional form.
- STF-22 Twin Flash Set
The ingenious design of the STF-22 combines core products including the TF-22 Twin Flash, SR-1 Shoe Ring, and FC-1 Macro Flash Controller to create a powerful flash unit.
- STF-8 Macro Flash (Highly Recommended)
What may have started as frustration for photographers turned into a game-changing product. For spider photographers, the STF-8 doesn’t get much better at lighting small objects.
Boasting a flexible twin-flash unit mounted on the front of the lens, photographers have the unique ability to shape light at individual strengths.
With a durable build to compliment m43 cameras, the compact unit fulfills all environments and weather conditions.
Dustproof, freezeproof, and splashproof, Olympus makes no excuse to capture a creative image in any condition. The STF-8 is the perfect companion for micro four-thirds spider photography.
- SRF-11 Ring Flash Set (Recommended)
If you are after a plug and play setup, then the RF-11 Ring Flash and FC-1 Macro Flash Controller could be ideal for your micro four-thirds camera.
The advantage of a ring flash is light is evenly distributed over your subject. In the case of spider photography, using a ring light will result in some creative rings in the eyes of your subject.
- RF-11 Ring Flash
If you prefer a simple option for lighting, then the TTL-AUTO mode is recommended when you combine the FC-1 Macro Flash Controller.
Without the controller, the flash is fully manual and may require constant adjustment. So, in other words, it is best to buy the set as mentioned above.
Once you have selected your flash, it’s best to turn the setting to manual power.
This way, you can either power up or down the light intensity, so your image isn’t over or underexposed. Depending on your aperture, you may only need 1/32 power instead of full brightness.
Essentially the goal of the flash is to fill in any shadows, so the lighting is soft and uniform.
Conclusion
As you can understand, there is a lot to try when photographing spiders. The learning process is long, and patience is required.
So we encourage you to get outdoors with your gear and build on your mistakes. It’s through this learning process that you will become a better spider photographer.